Have you ever wondered what separates a great video from an average one?
Many people assume it's expensive equipment, advanced filming techniques, or high-end editing. In reality, one of the most important factors is something much less visible: the storyboard.
Despite its importance, storyboarding is often overlooked during the production process. As a result, companies sometimes end up with videos that look polished but fail to deliver a clear message or achieve their intended goals. Common problems include a final product that doesn't match expectations, a lack of impact, or an editing process that becomes unnecessarily complicated. In many ways, the quality of a video is determined long before filming begins.
Starting production without a storyboard can create problems from the outset. During editing, teams often discover that key footage is missing, the narrative flow feels disjointed, or important scenes were never filmed. In some cases, companies have even been forced to schedule costly reshoots after realizing essential shots were overlooked during production.
A well-crafted storyboard helps prevent these issues by giving every scene a clear purpose and ensuring that the overall structure of the video is carefully planned before filming begins.
In this article, we'll explain the fundamentals of storyboarding, why it plays such a critical role in video production, and the key points to keep in mind when creating one. We'll also introduce several useful tools and apps that can help streamline the process. If you're unsure where to start with storyboarding, this guide will provide a solid foundation.
Understand what a storyboard is and why it matters
Learn when and how storyboards are used in video production
Explore practical techniques for creating effective storyboards
Discover useful apps and tools for creating storyboards efficiently
A storyboard is a blueprint that defines the structure and flow of a video
A storyboard is not merely a “doodle” or a “time-consuming task.” It serves as a roadmap for video production and a plan to ensure the quality of the final product.
To be more specific, a storyboard is a blueprint that outlines, in broad strokes and divided into sections such as the beginning, development, turning point, and conclusion, how the script will be visually expressed in video production. This makes it clear what needs to be done and what can be omitted during filming and editing.
The term “storyboard” derives from the English word "continuity" and was given this name because it explains a video using a sequence of images or text.
Why create a storyboard?
The purpose of a storyboard is to ensure that the cast and production team are all on the same page. Since video production involves combining multiple elements, it is often a collaborative effort involving several people. In other words, storyboards are useful for helping the team share a common understanding of “what” to shoot, “how” to shoot it, and “from which angle.”
When each creator has a grasp of the big picture, it becomes easier to make decisions on how to produce the desired world, message, key points, and even the music for the chorus.
Additionally, including information such as the performers’ movements, their paths, and the shooting order in the storyboard helps the video production process run smoothly.
Just as it’s easy to make mistakes without architectural blueprints or cooking recipes, we should consider storyboards to be essential in video production as well.
How spending time on a storyboard can save time during production
Isn't creating a storyboard a waste of time?
Some people may think, "If we're going to spend time creating a storyboard, wouldn't it be more efficient to use that time for filming or editing instead?"
In reality, the opposite is often true. When you consider the delays, confusion, and rework that can result from skipping the storyboard stage, investing time in planning can actually save significant time later in the production process.
For example, having a clear storyboard before filming gives the production team a roadmap for what needs to be shot and in what order. This helps reduce unnecessary retakes, prevents missed shots, and allows filming to proceed more efficiently.
It also helps everyone see the bigger picture
A storyboard is valuable not only during filming but also throughout the editing process. With a clear visual plan in place, editors can quickly understand how scenes should be connected and how the story should flow, making it easier to create a cohesive final product.
In one video production project we supported, taking the time to develop a detailed storyboard helped align expectations among all stakeholders from the outset. As a result, the team avoided major revisions and completed the project more than two weeks ahead of schedule.
Rather than making adjustments and corrections throughout production, establishing a shared vision from the beginning is one of the most effective ways to create a video that meets expectations while saving both time and resources.
What should be included in a storyboard?
A storyboard is typically created based on a written script and includes the following elements:
Scene illustrations or visual sketches
Scene descriptions (including character movements, actions, backgrounds, and other visual directions)
Sound effects and background music cues
A breakdown of camera shots and angles
The sequence of shots and their approximate durations
Dialogue, narration, and on-screen text
As discussed earlier in this article, a storyboard serves as the bridge between a script and the final video. Its purpose is to transform written ideas into a visual narrative, making it easier to see how the story will unfold on screen before production begins.
Rather than simply documenting what happens in the script, a storyboard focuses on how the story should be presented visually. By mapping out each scene in advance, creators can determine the most effective way to communicate key messages, emotions, and information to the audience.
Following the flow of the script, the next step is to identify the most important moments in the story and consider how they can be depicted visually through individual scenes and shots. This process helps ensure that every scene contributes to the overall narrative and supports the video's intended purpose.
Storyboards aren't just for animation
When people hear the term "storyboard," many immediately associate it with animation production, where storyboards have long played an essential role in planning scenes and sequences. However, storyboards are not limited to animation. Whenever a team collaborates to create visual content, a storyboard serves as a valuable communication tool that helps everyone share the same vision before production begins.
Storyboards are commonly used in a wide range of creative projects, including:
Animation production
Film and television drama production
Commercial and advertising production
Video game development
Music video production
Corporate promotional and marketing videos
3DCG and motion graphics production
In each of these fields, storyboards help creators plan scenes, visualize ideas, and align expectations among directors, producers, designers, editors, and other team members. By establishing a clear roadmap before production starts, teams can work more efficiently and reduce misunderstandings throughout the process.
To better understand how storyboards are used in practice, let's look at a few real-world examples.
In television and online commercials, storyboards are used to carefully plan how a product or service will be introduced within a limited amount of time. Every shot must serve a purpose, whether it is explaining a feature, highlighting a benefit, or reinforcing brand recognition.
For example, in commercials produced for Print Pack, storyboards are used to map out the sequence of scenes, camera angles, character actions, on-screen text, and narration before filming begins. This ensures that the final advertisement communicates its message clearly and efficiently while making the best use of the available production budget and runtime.
In the development of Uma Musume Pretty Derby, developed by Cygames, the storyboard team is responsible for creating a variety of in-game cinematic sequences. These include character acquisition scenes, skill activation cutscenes that appear during races, and story race sequences within the main narrative that can last several minutes.
Using rough sketches as a starting point, the team develops storyboards to visualize scene composition, camera movements, character actions, visual effects, and the overall flow of each sequence. These storyboards serve as a blueprint for production, helping transform initial concepts into polished in-game animations.
One of the team's primary goals is to communicate ideas clearly to other departments involved in development. By creating detailed and easy-to-understand storyboards, animators, designers, programmers, and other team members can share a common vision and work more efficiently throughout the production process.
In addition, storyboard production for Uma Musume Pretty Derby is carried out entirely through digital workflows. Digital tools make it easier to revise scenes, share materials across departments, and streamline collaboration, allowing the team to respond quickly to feedback and production changes.
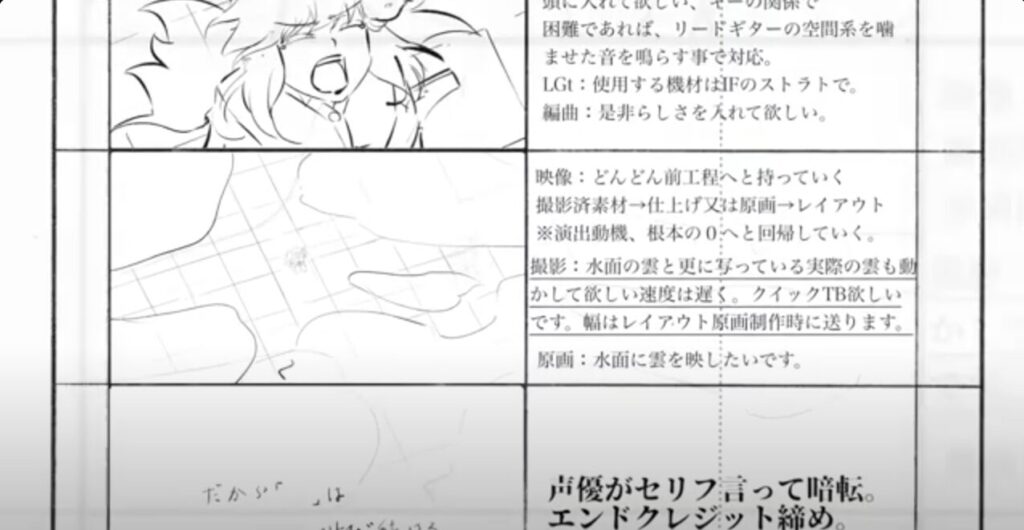
The anime series Lycoris Recoil, which aired in 2022, provides another example of how storyboards play a critical role in visual storytelling.
According to director Shingo Adachi, digital tools were used extensively during the storyboarding process. This approach was particularly valuable for planning and communicating complex action sequences, ensuring that the intended pacing, camera work, and character movements were clearly understood before animation production began.
Because the animators responsible for individual scenes had not yet been assigned at the storyboard stage, the storyboards needed to communicate the director's vision in as much detail as possible. As a result, many of the action scenes were depicted with highly detailed drawings and precise visual directions, allowing animators to accurately interpret the intended movements and choreography later in the production process.
This example highlights one of the key functions of a storyboard: serving as a communication tool that bridges the gap between creative vision and final execution. The more clearly an idea is conveyed through the storyboard, the easier it becomes for different departments to collaborate and bring that vision to life on screen.
How to create a storyboard for video production: 3 steps
1. Establish the story and identify key scenes
Before creating a storyboard, it is important to clearly define the video's purpose and overall narrative. Once the story has been established, identify the scenes that are most important and determine where your creative efforts should be focused. For entertainment content, these may be pivotal moments such as a protagonist overcoming a challenge, reaching a turning point, or achieving a goal.
Define the purpose of each scene
Each scene should have a clear purpose that contributes to the overall story. Defining this purpose helps create a logical flow from one scene to the next and ensures that the audience remains engaged throughout the video. When a scene lacks a clear objective, the message can become diluted, making it more difficult for viewers to follow the narrative or connect with the content.
As you plan your storyboard, consider what information each scene should communicate and what emotions, reactions, or actions you want to inspire in the viewer.
For example, if the goal of a scene is to highlight a product's value, the storyboard should clearly illustrate how the product is used and the benefits it provides. Visual demonstrations are often more effective than lengthy explanations when communicating a product's strengths.
In contrast, scenes intended to establish the story's setting or convey a character's emotions may rely more heavily on visual atmosphere. Elements such as lighting, camera angles, color palettes, music, and pacing can all help reinforce the intended mood and emotional impact.
By clearly defining the purpose of each scene from the outset, you can maintain a consistent direction throughout the storyboard and create a more engaging viewing experience. Whenever possible, focus on visual and emotional storytelling rather than relying on excessive explanations, allowing the audience to naturally connect with the story and its message.
2. Visualize each scene with simple sketches
When creating a storyboard, artistic ability is far less important than clear communication. Stick figures, rough sketches, and simple diagrams are perfectly acceptable as long as they effectively convey the intended idea.
The goal is not to create polished artwork but to visually communicate what happens in each scene. Think of a storyboard as a visual outline that helps everyone understand the overall flow of the video at a glance.
For example, it may be enough to illustrate that a character moves from left to right across the screen while a product appears in the background. As long as the production team can share a common understanding of the scene's composition, movement, and purpose, the storyboard is doing its job.
Prepare a storyboard template
Before you begin sketching, it is helpful to prepare a storyboard template. Each scene should be contained within its own panel, with multiple panels typically arranged on a single page. Keeping the size and placement of panels consistent makes the storyboard easier to read and follow.
It is also important to choose a template that matches the aspect ratio of the platform where the video will be published. For example, a storyboard for a YouTube video may use a horizontal 16:9 format, while content intended for social media platforms such as Instagram Reels, TikTok, or YouTube Shorts may require a vertical 9:16 layout.
Fortunately, many free storyboard templates are available online, making it easy to find a format that suits your project's needs. Starting with a standardized template can help streamline the planning process and ensure consistency throughout production.
Reference: Canva storyboard templates.
Develop scenes from your sketches
Once you have prepared your storyboard template, you can begin creating individual scenes based on your script. As you sketch, think of each panel as the viewer's screen and try to represent the composition as closely as possible to how it will appear in the final video.
When planning each shot, consider where key visual elements will be placed within the frame. If the finished video will include text overlays, subtitles, or graphics, be sure to account for their placement during the storyboarding stage. This can help prevent important elements, such as a speaker's face, product details, or key actions, from being obscured later in production.
You do not need to rely solely on hand-drawn sketches. If drawing is not your strength, using reference images can be just as effective. Many creators collect images from online sources, mood boards, stock photo libraries, or previous projects and place them directly into their storyboard template. This approach can help communicate visual ideas more clearly while speeding up the planning process.
Whether you use sketches, photographs, or a combination of both, the goal remains the same: to create a visual representation of each scene that allows everyone involved in the project to share a clear understanding of the final vision.
3. Add details to each scene
Once the visual layout of each scene has been sketched out, the next step is to add supporting information that makes the storyboard more detailed and actionable. These notes help communicate the intent behind each shot and provide clear guidance for filming, animation, and editing.
For example, a note such as "The camera slowly zooms in on the subject to build tension" gives the production team a clear understanding of how the scene should be executed and what emotional effect it should have on the audience.
As you develop your storyboard, think not only about what appears on screen but also about how each scene contributes to the overall story and viewing experience.
What information should be included for each scene?
A well-structured storyboard should include the following supporting details:
Stage directions, dialogue, and narration
The estimated duration of each shot
Scene and shot numbers
Total runtime and page numbers
Let's take a closer look at each of these elements.
Add stage directions, dialogue, and narration
Alongside each storyboard panel, include notes that explain what is happening in the scene. Stage directions describe the movements and actions of characters, performers, objects, or the camera. These notes help ensure that everyone involved understands how the scene should unfold.
You should also include:
Character dialogue
Narration or voice-over scripts
Camera instructions
Additional production notes when necessary
Many storyboard formats place stage directions beneath or beside the illustration, while narration and voice-over notes are listed separately for clarity.
When writing dialogue, identify the speaker clearly using a format such as:
Sarah: "Let's get started."
For narration, many production teams use abbreviations such as VO: (voice-over) or NARR: (narration).
Indicate the duration of each shot
Once the content of a scene has been defined, estimate how long each shot will remain on screen. This helps ensure that the overall pacing of the video aligns with the planned runtime.
If the final video must fit within a specific duration, such as a commercial or social media advertisement, the length of each shot becomes especially important. Longer scenes may need to be shortened, while shorter scenes may require additional time to communicate information effectively.
For television commercials and broadcast content, frame rate may also be specified. Frame rate is measured in frames per second (fps) and determines how many individual frames are displayed each second. A common broadcast standard is 29.97 fps.
Keep in mind that shot durations often change during editing, so it is helpful to communicate early in the production process that timing estimates may be adjusted later.
List scene numbers and shot numbers
Assigning scene and shot numbers makes the storyboard easier to reference during production meetings, filming, and editing.
Typically:
Scene numbers change when the location, setting, or time period changes.
Shot (or cut) numbers change whenever the camera angle, composition, or viewpoint changes within a scene.
For example:
Scene 1
Shot 1
Shot 2
Shot 3
Scene 2
Shot 1
Shot 2
Using a clear numbering system helps team members quickly identify specific sections of the storyboard and improves communication throughout production.
If additional scenes or shots need to be inserted later, letter designations such as Scene 1A or Shot 2B can be used without disrupting the existing sequence.
Include the total runtime and page numbers
Finally, include the total planned runtime of the video as well as page numbers for the storyboard document.
Calculating the total runtime by adding the duration of each shot allows you to verify that the project remains within its intended length. If the total exceeds the target runtime, adjustments can be made before filming begins, saving time during editing.
For projects with strict timing requirements, such as television commercials, the total runtime may need to be exact. A commercial scheduled for 15 or 30 seconds must be carefully timed so that every shot fits within the allotted duration.
Even for videos without strict broadcast limitations, reviewing the total runtime helps ensure that the final product maintains an appropriate pace and delivers its message effectively without becoming too long or too short.
How to structure scenes and plan storyboard cuts
When should you decide on cut points?
The timing of cuts is one of the most important factors in determining a video's rhythm, pacing, and overall viewing experience. Well-timed cuts help maintain audience engagement, guide attention, and create a natural flow from one shot to the next.
When planning your storyboard, consider where cuts should occur and what effect they will have on the viewer. Some common approaches include the following:
Cuts that follow character movement
One of the most natural places to insert a cut is during movement. Cutting as a character changes direction, performs an action, or shifts their gaze helps create a seamless transition between shots and maintains visual continuity.
Cuts at emotional high points
Strategically placing cuts during moments of heightened emotion can increase dramatic impact. Whether the scene is building suspense, excitement, surprise, or tension, changing shots at the right moment can amplify the audience's emotional response and keep them invested in the story.
Cuts during pauses in dialogue
Dialogue-driven scenes often benefit from cuts that follow the natural rhythm of conversation. Switching between speakers during pauses or reactions can make exchanges feel more dynamic and help emphasize important lines or emotional reactions.
For example, in a sports video, cutting to a different angle at the exact moment a player kicks a ball can make the action feel more energetic and impactful. Similarly, in a product video, changing shots as a key feature is demonstrated can help maintain visual interest and highlight important details.
At the same time, it is important not to overuse cuts. Constantly changing shots can overwhelm viewers and make a video feel rushed or difficult to follow. Effective editing balances moments of action with moments of stability, creating a rhythm that feels engaging without becoming exhausting.
When planning your storyboard, think carefully about where cuts can enhance the story, direct attention, and support the emotional flow of the video. The best cuts often feel invisible, guiding the viewer naturally from one moment to the next.
Guide the viewer's attention through effective composition
Composition plays a critical role in directing the viewer's attention and ensuring that important information is communicated clearly. A well-composed shot helps viewers instantly understand what they should be looking at, making the video more engaging and easier to follow.
When planning your storyboard, consider how the arrangement of elements within the frame can support your message and guide the viewer's eye naturally.
Rule of thirds
One of the most widely used composition techniques is the rule of thirds. By dividing the frame into three equal sections both horizontally and vertically, you create four key intersection points where important subjects can be placed.
Positioning key elements near these intersections often results in a more balanced and visually appealing composition than placing everything directly in the center of the frame.
Guiding the viewer's gaze
Effective composition uses visual cues to direct attention toward the most important parts of a scene. Elements such as lighting, movement, leading lines, and background design can all help guide the viewer's gaze naturally.
For example, a brightly lit subject against a darker background will immediately draw attention, while movement within a scene can direct viewers toward a specific action or focal point.
Creating a sense of depth
Adding depth to a shot can make footage feel more immersive and visually dynamic. One common technique is to place larger objects or visual elements in the foreground while positioning the main subject farther back in the frame.
This layered approach creates a stronger sense of three-dimensional space and helps prevent scenes from feeling flat.
For example, in a product showcase video, the product may be positioned prominently in the foreground while the background is softly blurred. This technique naturally directs the viewer's attention to the product while minimizing distractions.
On the other hand, overly busy backgrounds or unnecessary visual elements can compete for attention and make it difficult for viewers to identify the most important part of the scene. By keeping compositions clean and intentional, you can communicate your message more effectively and create a more polished final video.
Combine visuals and sound to create emotional impact
Sound plays a vital role in shaping how viewers experience a video. When music, sound effects, and visuals work together, they can strengthen emotions, reinforce key moments, and make scenes more memorable. By planning audio elements during the storyboarding stage, you can ensure that sound supports the story rather than being treated as an afterthought.
Choose music that matches the emotion of the scene
The music should reflect the mood and purpose of each scene. Thoughtfully selected background music can help guide the audience's emotional response and strengthen the overall message.
For example:
Soft piano music can enhance emotional or reflective moments.
Upbeat music can create excitement and energy.
Dissonant chords or suspenseful soundscapes can build tension and anticipation.
Inspirational music can reinforce feelings of achievement or optimism.
When storyboarding, consider how the emotional tone of the music will evolve alongside the story.
Use sound effects to support movement
Sound effects add realism and help viewers feel more connected to what they see on screen. Simple sounds such as footsteps, doors closing, keyboard typing, or objects being handled can make scenes feel more immersive and believable.
In action-oriented videos, carefully timed sound effects can also help emphasize movement and make important actions feel more impactful.
Synchronize visuals with the rhythm of the music
Matching cuts, transitions, and visual movements to the tempo of the music can create a smoother and more engaging viewing experience. This technique is commonly used in commercials, promotional videos, music videos, and action sequences to maintain energy and momentum.
For example, cutting between shots on the beat of the music can make a sequence feel more dynamic and polished. Similarly, in action scenes, pairing visual moments such as impacts or explosions with appropriately timed sound effects can significantly increase their dramatic effect.
However, it is important to avoid overusing music and sound effects. Constant audio cues can overwhelm the viewer and reduce their effectiveness. In many cases, strategic use of silence or minimal sound can create just as much impact as a dramatic soundtrack. The goal is to use audio intentionally, enhancing key moments while allowing the story and visuals to breathe when necessary.
Connect your story through smooth scene transitions
The way one scene transitions into the next has a significant impact on how viewers experience a video. Well-executed transitions help maintain the flow of the narrative, guide the audience through changes in time or location, and create a more immersive viewing experience.
When planning your storyboard, consider not only the content of each scene but also how scenes will connect to one another.
Fade-ins and fade-outs
Fade-ins and fade-outs are commonly used for slower-paced or emotional moments. These transitions create a gentle shift between scenes and can effectively signal the beginning or end of a sequence, the passage of time, or a change in mood.
Because of their subtle nature, fades are often used in dramatic, reflective, or cinematic content.
Cuts
A standard cut is the most common transition in video production. Cuts are immediate and direct, making them ideal for maintaining momentum and keeping viewers engaged.
Quick cuts can increase tension, energy, or excitement, while carefully timed cuts can help control pacing and draw attention to important actions or reactions. For this reason, cuts are frequently used in commercials, interviews, sports footage, and action sequences.
Transition effects
Effects such as wipes, zoom transitions, dissolves, and crossfades can help connect scenes in a visually distinctive way. When used appropriately, they can indicate changes in location, perspective, or time while helping viewers follow the narrative.
For example, documentary productions sometimes use crossfades to contrast past and present events or to create a smooth transition between related subjects.
However, transition effects should be used thoughtfully. Overusing flashy effects can distract viewers and make the video feel less professional. In most cases, the best transitions are those that support the story without drawing unnecessary attention to themselves.
By carefully considering scene transitions alongside composition, cut timing, and the relationship between sound and visuals, you can create a more cohesive and engaging viewing experience. Thoughtful planning at the storyboard stage helps ensure that each scene flows naturally into the next, resulting in a video that is easier to follow and more impactful for the audience.
What apps and tools are useful for storyboarding?
In recent years, a wide range of digital tools have made storyboard creation faster, more efficient, and easier to share with team members. While traditional hand-drawn storyboards are still used in some productions, many creators now rely on digital apps to streamline the planning process and simplify revisions.
Before exploring specific tools, it's helpful to understand the differences between analog and digital storyboarding and the advantages each approach offers.
Understanding the differences between analog and digital storyboarding
Storyboards can generally be created using either traditional analog methods or digital tools. Both approaches have their strengths, and the best choice often depends on the project's scale, workflow, and production requirements.
Analog storyboarding
Analog storyboarding involves drawing scenes by hand on paper or printed storyboard templates.
Advantages:
Quick and easy to start without specialized software
Ideal for brainstorming and rough concept development
Allows for spontaneous sketching and idea generation
Disadvantages:
Revisions can be time-consuming
Sharing with remote team members may be difficult
Organizing and managing multiple versions can become cumbersome
Digital storyboarding
Digital storyboarding uses software, tablets, and online collaboration tools to create and manage storyboard panels.
Advantages:
Easy to edit and update scenes
Simplifies collaboration and feedback
Allows assets, images, and notes to be shared instantly
Makes version control and project management easier
Can incorporate photos, graphics, and reference materials directly into the storyboard
Disadvantages:
Requires familiarity with software and digital tools
Some applications may require paid subscriptions
Initial setup can take longer than sketching on paper
As video production increasingly involves remote collaboration and rapid revisions, digital storyboarding has become the standard workflow for many production teams. However, even today, some creators prefer to begin with hand-drawn sketches before transferring their ideas into a digital format for further development.
In the following section, we'll look at several free and beginner-friendly apps that can help you create storyboards more efficiently.
What free storyboarding apps and tools are recommended?
If you're planning to create storyboards digitally, several tools can help streamline the process. The best option will depend on your workflow, budget, and the level of detail required for your project. Here are a few popular storyboard applications worth considering.
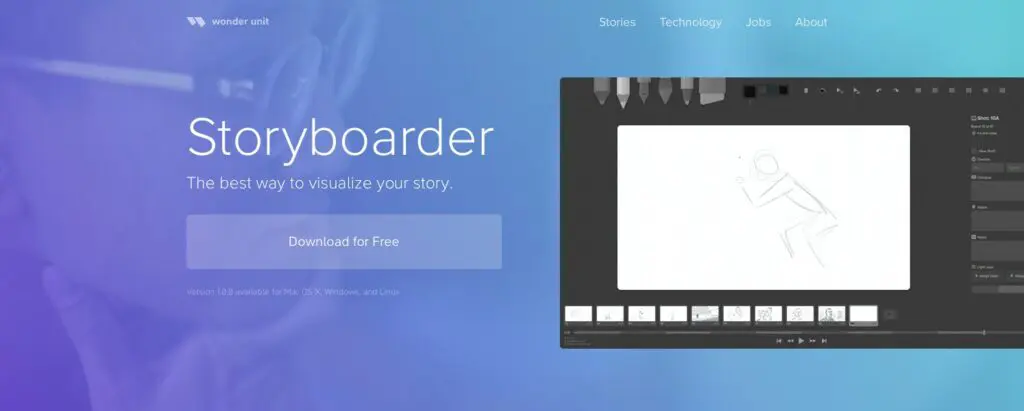
Storyboarder
Storyboarder is a free, open-source storyboard application designed specifically for filmmakers, animators, and video creators. Its intuitive interface makes it easy to sketch scenes, organize shots, and quickly iterate on ideas without needing advanced drawing skills.
Key features include:
Simple storyboard creation and editing tools
Built-in timing and shot management features
Integration with animation and video production workflows
Free to download and use
Because it is purpose-built for storyboarding, Storyboarder is often a great starting point for beginners and professionals alike.
DROMI
DROMI is a cloud-based storyboarding and video planning tool that allows teams to collaborate on projects online. It is particularly useful for productions that involve multiple stakeholders, as storyboard revisions and feedback can be shared efficiently across teams.
Key features include:
Online collaboration and sharing
Easy storyboard management and revisions
Project planning and workflow support
Accessible from multiple devices
DROMI is well suited for production teams looking for a centralized platform to manage storyboard development.
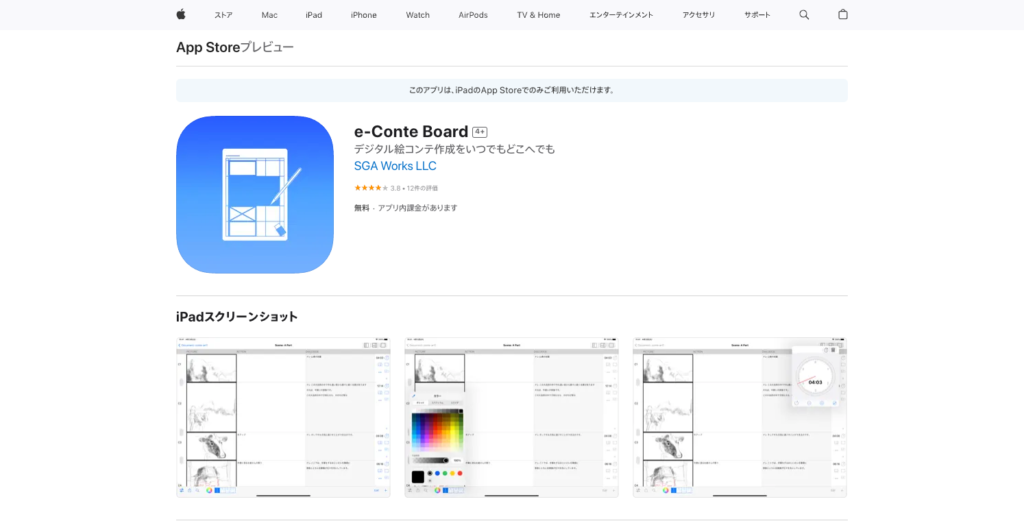
e-Conte Board
e-Conte Board is a digital storyboarding tool developed specifically for creating and managing storyboards in a production environment. It allows users to combine sketches, notes, dialogue, and production information into a single organized workflow.
Key features include:
Storyboard panel creation and management
Support for production notes and annotations
Easy editing and revision capabilities
Designed for professional video and animation workflows
Its focus on production management makes it particularly useful for larger projects that require detailed planning.
Choosing the right tool
Each of these applications offers different strengths. If you're looking for a free and straightforward solution, Storyboarder is an excellent choice. For team-based projects that require online collaboration, DROMI may be a better fit. Meanwhile, e-Conte Board is well suited for creators who need a more production-focused workflow.
Regardless of which tool you choose, digital storyboarding can make it easier to organize ideas, communicate with collaborators, and revise scenes efficiently throughout the production process.
Summary: how to create an effective storyboard
Let's review the key points covered in this article:
A storyboard serves as the blueprint for a video production.
Storyboards help establish a shared understanding among everyone involved in the project, including clients, cast members, and production staff.
While commonly associated with animation, storyboards are also widely used in film, television, advertising, video game development, corporate videos, and many other forms of visual media.
Before creating a storyboard, it is important to clearly define the project's objective, target audience, and distribution platform.
Storyboards can be created using either traditional analog methods or digital tools, although digital workflows have become increasingly common in recent years.
Artistic ability is not the most important factor when creating a storyboard. Clear communication and visual clarity are far more valuable than detailed illustrations.
Because storyboards often evolve throughout the production process, it is best to focus on communicating ideas effectively rather than perfecting every detail.
A storyboard is an essential planning tool that helps transform ideas into a clear visual roadmap for production. By organizing scenes, camera angles, timing, and visual storytelling elements in advance, creators can streamline the production process and reduce misunderstandings among team members.
Most importantly, an effective storyboard communicates ideas clearly. By focusing on the purpose of each scene, using thoughtful composition, and keeping visual directions concise and easy to understand, you can create a storyboard that serves as a strong foundation for a successful video project.
Whether you're producing an animation, commercial, promotional video, or short film, the techniques covered in this guide can help you plan more effectively and bring your creative vision to life with greater confidence and efficiency.
Marketing Perspective in Japan: Beyond Just Creation
NOKID provides creative planning and production for PR using characters, events, and video content. Effective videos balance business and creative perspectives, e.g., short clips optimized for TikTok, designed to capture attention in the first 2–3 seconds.
For first-time animation or PR-focused content, feel free to consult with us.
Tokuma Kanna
Founder and CEO of NOKID Inc., a premier creative studio specializing in short-form animation and graphic design. With a focus on narrative-driven visual storytelling, he has spearheaded high-profile projects across the global entertainment landscape. His portfolio includes the acclaimed VALORANT: YORU TYPICAL DAYS cinematic, the Hatsune Miku x Seven Premium 15th Anniversary campaign, and Koda Kumi’s music video "100 no Kotoba-tachi e." As a leading producer in the PV and MV sectors, Tokuma continues to redefine the intersection of animation and contemporary digital media.